Log in to your Simply Voting account by navigating to Simply Voting’s homepage and clicking “Login” in the upper right corner. The first page you will see is the Election Manager’s “Elections” page. From this initial page you will start building your election.
An Election represents a voting event. All elections begin in Draft status, and while in Draft status your election is fully editable.
Your election cannot be voted in until you change the status from Draft, as discussed further on in this Guide. You may also have multiple simultaneous or overlapping elections, serving multiple voting events.
To start creating your election, click on the blue Create New Election button. If no elections are on your account, your Elections page will look like this:

If elections are on your account, your Elections page will look like this:

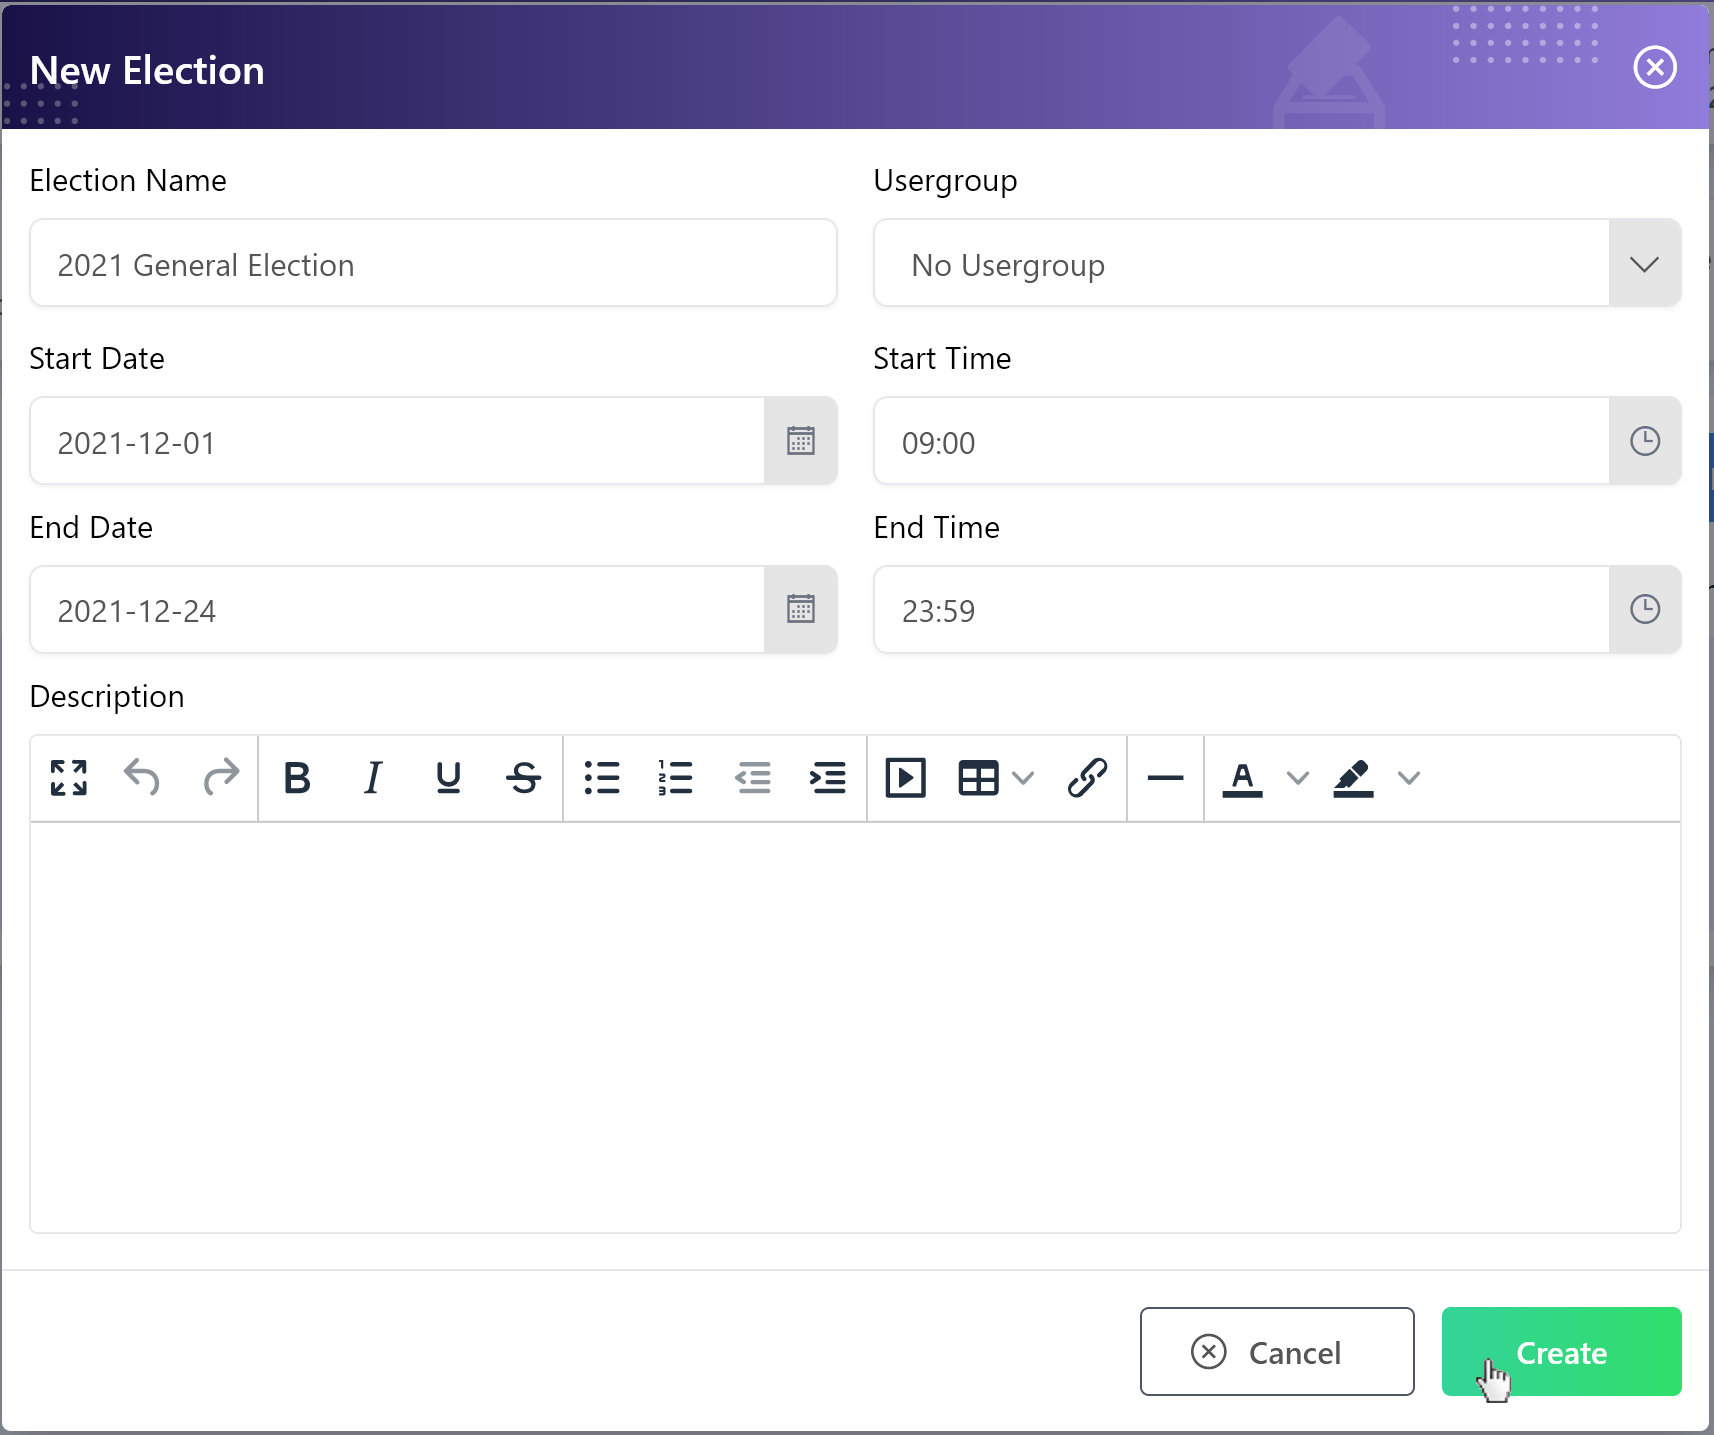
In the pop-up window that appears, enter a title for your election describing your voting event in the Election Name field (e.g. “2021 General Election”), Usergroup if applicable, and define the election’s Start Date and Time, and End Date and Time. Clock times correspond to the time zone selected on your User Profile page.
You can add an optional Description describing the election, which will appear at the top of the election ballot. As in any other Description field in the Election Manager, you may add emphasis by using the Formatting Buttons in this field.
Once you have filled out the New Election form, click the Create button.

Description Formatting Tips
Hover over a Formatting Button if you are unsure about its function. If you have a large amount of text, try using the “Fullscreen” button to make your setup easier.
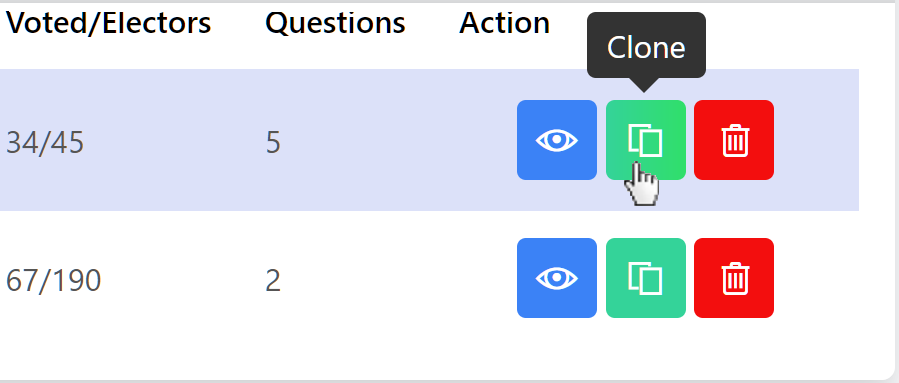
You may optionally Clone an existing election to copy over its dates, electors, and questions into the new election. To do so, click on the desired Clone button from the Action column on the Elections page.

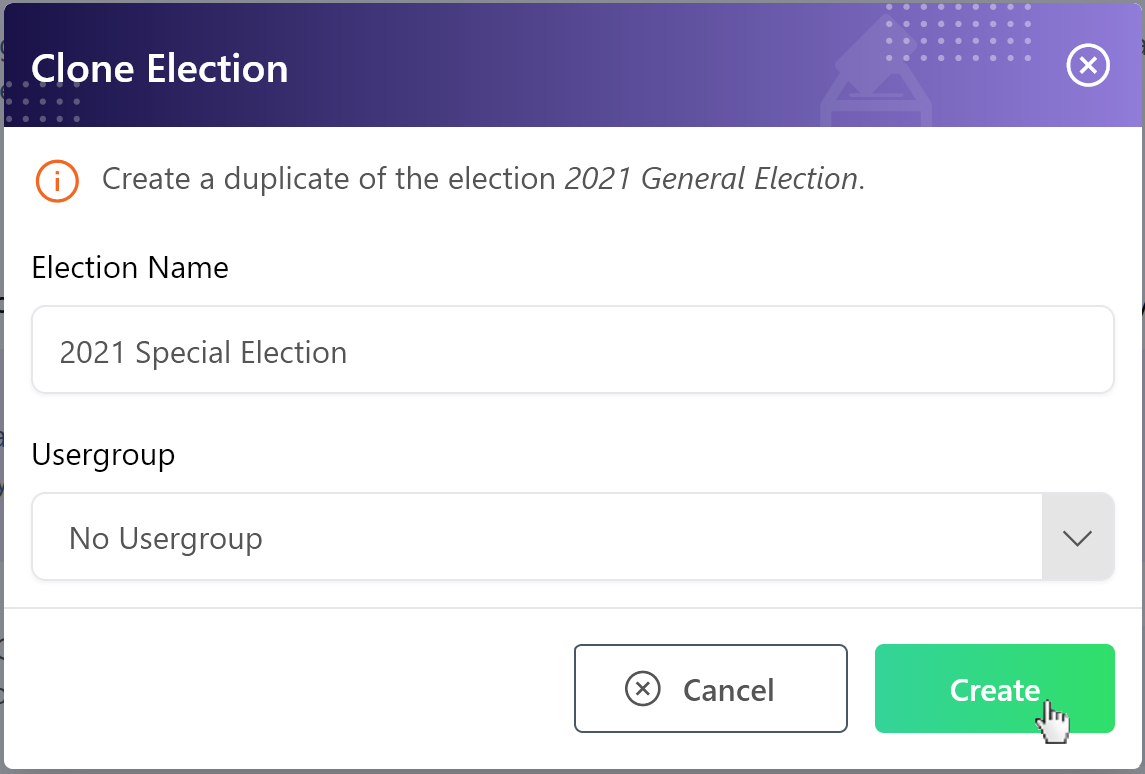
In the pop-up window that appears, enter a title for your duplicate election in the Election Name field (e.g. “2021 Special Election”) and specify a Usergroup if necessary. Then, click the Create button.
