Managing Users, Roles, and Usergroups
    • Dark
      Light

    Managing Users, Roles, and Usergroups

    • Dark
      Light

    Article summary

    Important Note: Super users, other users, and owner user

    Super users have access to all navigation menu pages and all subsections within those pages. Super users may contact Simply Voting for technical support or assistance.

    Other users (such as Full Access, Read Only Access, and No Access users) have reduced or no access to these navigation menu pages, and some subsections within those pages. These users must contact their organization's Super Users for technical support or assistance.

    The owner user is reserved for the overall owner of the account and is the designated primary contact for Simply Voting staff.

    In the Election Manager tool, navigate to the Users page.

    Understanding User Roles

    Users are individuals who have access to the Election Manager tool. There are four predefined user roles: Super User, Full Access, Read Only Access, and No Access. Independent of user role, one user is designated as the owner of the account.

    Each user has their own password to log into the Election Manager tool. Only Super users can create other users, as well as assign different roles for each user, specifying the features they are allowed to use and the elections they are allowed to access. There must always be at least one Super user in an account.

    There can only be one owner user at any given time, and only the owner user can edit themselves or transfer account ownership to another user. Simply Voting staff may also confer with the owner user regarding any questions or support issues related to their accounts, as the owner user is the designated primary contact for the account.

    Are multiple users necessary?

    Organizations have varying needs when it comes to user access to the Election Manager tool.

    For instance, your organization may have the need for an external auditor to keep track of turnout during the election and independently tabulate the results at the close of the election. To address this need, you could create a user for this auditor and give them permission access to the Electors, Reports, Results, and Election Log sections.

    Other organizations may simply employ Super users, foregoing other user roles, if all such individuals have essentially the same responsibilities, duties, access rights, and roles.

    And still other organizations may only require one individual to manage their account and elections.

    How your organization sets up or configures users is entirely your own choice.

    Sharing User Logins

    Ensuring that no users are sharing a single username is best practice.

    This helps keep your overall account safe, and also enhances the Voting System's ability to provide an audit log (both in the Account Log or in individual Election Logs) of a given user's interaction with your account and your elections. To keep things transparent and auditable, ensure that multiple users each have their own username and password.

    Understanding Usergroups

    Usergroups allow control over which users can access which elections.

    Each user can be assigned to one or several usergroups, and when a user creates an election they may assign the election to a usergroup to which they belong, so that only users of that assigned usergroup will be able to access that election.

    Deleting a usergroup makes all elections previously assigned to that usergroup accessible to all users. You may want to consider assigning such elections to a new usergroup before deleting an old one, if you do not want all users to have this new access.

    Are usergroups necessary?

    Organizations have varying needs when it comes to usergroups.

    For instance, you may have the need to run a few elections with varying categories or contingents of your entire electorate, but you may also have the need for unique users to set up and manage each of those elections. To address this need, normal users could be assigned to specific usergroups which are setup to address each group’s election, without interferring with each other's work. Super users are automatically added to a "super user" usergroup.

    Usergroups may also simply be a handy way to categorize groups of elections at-a-glance, even if all users have access to all elections.

    Alternatively, usergroups may also simply be handy way to categorize groups of users at-a-glance, such as creating a usergroup of internal elections staff with permanent access and a separate usergroup for external auditors or scrutineers with perhaps temporary access.

    How your organization uses usergroups is entirely your own choice.

    Creating Users

    To create a new user, click on the blue Create User button on the Users page.
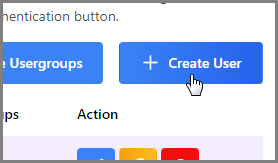
    image.png

    In the pop-up window that appears, specify a username, the user's full name, their phone number, their email address, their time zone, and their role.

    There are four predefined user roles you may choose from, or may create a custom role:

    • with Super User, the user can access the entire Election Manager tool as well as create and manage other users. Super users cannot be restricted by usergroup, have full access to all sections in an election, may manage account-wide Settings, and may access the Billing section that contains historical invoices.

    • with Full Access, the user can navigate to and access all sections and, in sections where functions can be performed (such as changing or adding data), they are allowed to perform all allowed functions.

    • with Read Only Access, the user can navigate to and access all sections, but they cannot change or add any new data to these sections.

    • with No Access, the user cannot navigate to nor access any section.

    • with Custom, the user can navigate and access, as well as perform functions within, the sections you specify.
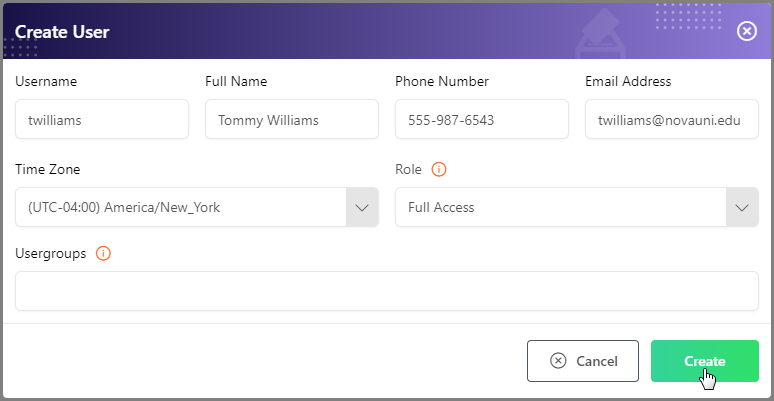
    image.png

    Once you have filled out the Create User form, click Create. Upon successful creation of a user, you will receive a green Success Message. An email from Simply Voting will be sent to the user's specified email address containing password activation instructions. Instruct your users to keep an eye out for their activation email.

    EM_redesign_account_management_create_user_success

    Formatting Usernames

    Your organization may choose anything for a user's username, though you should opt for something that is memorable.

    If you also plan on creating additional users to support your organization's election management, it may be prudent to decide on a consistent format, though one isn't strictly necessary.

    For example, maybe all users, including yourself, will have firstname.lastname as a format. Or perhaps you and all your users have organizational email addresses that could be used as a format. Or perhaps usernames could instead be based on an individual's position or election duties, like cro for chief returning officer or auditor for an election auditor, etc.

    In the end, as long as whatever you end up choosing is memorable and makes sense for your organization and its use case, that is all that matters!

    Note that the only non-alphanumeric characters that are allowed in usernames are:

    • underscore: _ (e.g. tommy_williams)
    • period: . (e.g. tommy.williams)
    • hyphen: - (e.g. tommy-williams)
    • at: @ (e.g. twilliams@example.com)

    Managing Users

    The Account Log section within Settings retains records related to user management.

    In the user listing located at the bottom of the Users page, for the user you wish to manage, click on their Edit button beneath the Action column to manage their details and permissions. You may also Filter and Search if necessary in order to locate a user.

    Other Actions are also possible from the main user listing. You may also:

    • Delete a user thereby destroying their individual user account.
    • Send password reset instructions via email to an individual user
    • Disable two-factor authentication (if enabled) if a user no longer has access to their two-factor device.

    EM_account_users_with_2fa

    On the Edit User page, you can update their user information as well as configure their user role or custom permissions.
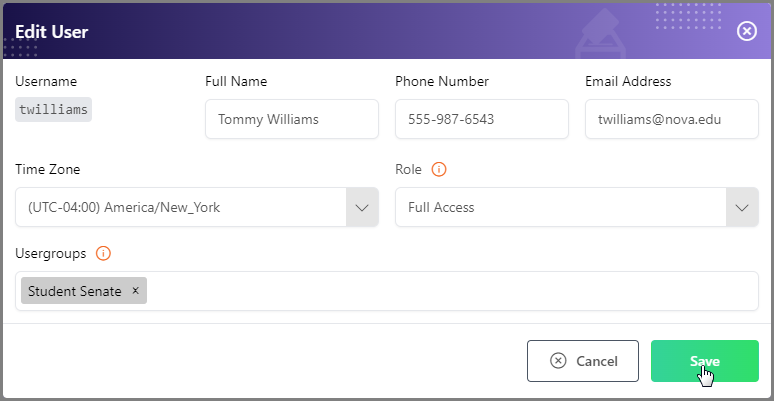
    image.png

    Owner Permissions and Transferring Account Ownership

    The owner user may be configured with reduced or no access like a normal user, which may be appropriate when owners do not actively participate in election setup but have some overall organizational authority that must be reflected in account ownership and need to be designated as primary contact to Simply Voting staff. Often though, the owner user is also Super user.

    Regarding the transfer of account ownership, the current account owner user must be involved with any transfer process to another user.

    To transfer ownership, on the Users page, located at the bottom of the User listing, the account owner user may click on the Change Account Owner button to initiate the process. Select the new owner from the available users in the dropdown, proceed to confirm you understand the implications of the decision, and finally click the Transfer button to complete the process.

    EM_redesign_account_management_transfer_owner

    User permissions for both parties remain unchanged during the transfer process.

    Creating Roles

    Roles provide a set of permissions which can be applied to multiple users. By default, all accounts come with four predefined user roles that cannot be updated nor deleted: Super User, Full Access, Read Only Access, and No Access.

    Additional roles can also be created that make it easy to manage multiple users with custom permissions. For example, you may create a role called "Scrutineer" for any scrutineer user that needs read-only access to electors, results, and reports but no access to other sections.

    To create a new role, click on the blue Manage Roles button on the Users page.

    image.png

    In the pop-up window that appears, click on the blue Create Role button.

    image.png

    From this window, you can specify a name for the custom role, as well as varying degrees of access levels:

    • with "Full Access", users with this role can navigate to and access these sections and, in sections where functions can be performed (such as changing or adding data), they are allowed to perform all allowed functions.

    • with "Read Only Access", users with this role can navigate to and access these sections, but they cannot change or add any new data to these sections.

    • with "No Access", users with this role cannot navigate to and access these sections.

    role_permissions.png

    Once you have filled out the Create Role form, click Create.

    The above custom role has been setup to provide access levels that an auditor or scrutineer might need to conduct their duties during and after the election. Below, you can see the above access permissions in action:

    em_redesign_sample_auditor_access

    Managing Roles

    Once a role is created, you may assign it to existing users by clicking the blue Edit button in the Action column on the Users page. You may also assign this role to any new user via the Create User form on the Users page.

    To edit a role, click on the blue Edit button in the Action column of the Manage Roles menu. Note that editing a role's permissions immediately affects all users assigned to that role.

    image.png

    To delete a role, click on the red delete button in the Action column of the Manage Roles menu. Custom roles can be deleted as long as there are no users assigned to them.

    Creating Usergroups

    To create new usergroup, click on the Manage Usergroups button within the Users page to navigate to the Usergroups section. Then specify a name (e.g. "Student Senate") in the available field. Click Create to create the usergroup.

    EM_redesign_account_management_create_usergroup_fixed

    Once successful, you will receive a green Success Message in the bottom right corner.

    image.png

    You can re-name or edit a usergroup’s name by clicking on the Edit button in the Action column.

    After creation, your usergroup is empty since users and elections still have to be assigned.

    Managing Usergroups Assigned to Users

    Once a usergroup and one or more normal users have been created, you may now begin assigning these users to their appropriate usergroups.

    On the Users page click on the Edit button for the user you would like to manage and assign to a usergroup. On the Edit User page, you can now assign this user to any desired usergroups.

    image.png

    Click the Save button once user editing is finished.

    You will receive a green Success Message indicating the user has been updated. In the user listing below you will also see the the newly assigned usergroups.

    EM_redesign_account_management_managing_usergroup_assignments_success_fixed

    In this above sample, our "twilliams" auditor has been assigned to two usergroups: "Clubs" and "Student Senate." Thus, this auditor, would be able to access any elections assigned to these usergroups, assuming their access permissions have been configured as described in earlier in this guide.

    Again, keep in mind that any elections not assigned to a usergroup are accessible to all users. To restrict access to one or more elections, you must assign elections to a particular usergroup.

    Managing Usergroup Assignments for Elections

    To assign new elections to a usergroup at election creation, simply select the usergroup of choice from the available previously created usergroups.

    Super users, like in the example below, can assign an election to any usergroup, or if desired select No Usergroup assignment.

    EM_redesign_account_management_assigning_usergroup_at_election_creation

    Normal users, like in the example below, can only assign an election to usergroup(s) to which they themselves belong.

    EM_redesign_account_management_assigning_usergroup_at_election_creation_normal

    From time to time, super users and normal users may need to change an existing election’s usergroup assignment. All users may assign existing elections with Draft status to any usergroup to which they themselves belong. Super users also have the ability to select usergroup assignments for elections with Waiting, Active, and Finished statuses.

    To adjust usergroup assignment, View the desired election and navigate to the Election Details section.

    Then you can change the usergroup assignment of the election. Below is an example of an election with Draft status.

    EM_redesign_account_management_assign_election_usergroup